Web Export Limitations
Utilizing the OVF Tool to export VMs as OVA files is the ideal solution to circumvent timeout issues that may arise when the VM size exceeds 2GB.
Install the Latest OVF Tool
The most recent OVF Tool version may help reduce errors, such as “
Error: cURL error: SSL connect error”.
Download the VMware OVF tool from the VMware website.
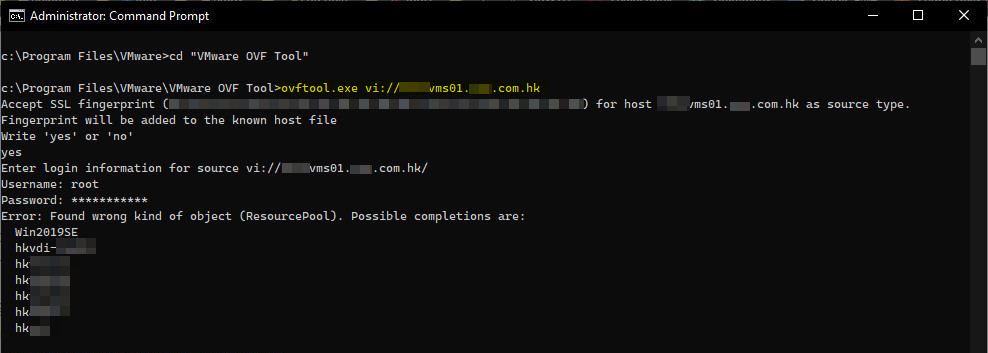
List VMs on Host using OVF Tool
Navigate to the OVF Tool directory in CMD (Administrator mode)
cd “C:\Program Files\VMware\VMware OVF Tool”
ovftool.exe vi://vms01.com.hk
OR
ovftool.exe vi://root:"P@ssw0rd"@vms01.com.hk
| Parameter | Description |
|---|---|
| root | Host login account |
| P@ssw0rd | Host login password |
| vms01.com.hk | Hostname or IP address |

The list of VMs available for export to OVA is displayed.
Export VM to OVA using OVF Tool
ovftool.exe vi://root:"P@ssw0rd"@vms01.com.hk/VM_TEST c:\tools\VM_TEST.ova
“
c:\tools\VM_TEST.ova”: it will be saved as “VM_TEST.ova” in the “c:\tools" directory.

Import the OVA for Test
ovftool.exe --sourceType=OVA -n=VM_TEST -ds=Datastorage "c:\tools\Win2019SE.ova" vi://root:"P@ssw0rd"@vms01.com.hk
| Parameter | Description |
|---|---|
| –sourceType=OVA | Specifies the type of the source file (OVA format) |
| -n=VM_TEST | Specifies the name of the target virtual machine or appliance (VM_TEST) |
| -ds=Datastorage | Specifies the target datastore for deployment (Datastorage) |


Conclusion
Using the OVF tool, you can package a VM or virtual appliance into a single file that includes the VM configuration settings, disk images, and other necessary files. This file can then be deployed to any VMWARE environment that supports the OVF format, allowing for easy migration and distribution of VMs.
