
| Introduction: |
Usually, IP addresses are dynamically assigned by the router’s DHCP server on most network devices. But using a static IP address on the server makes the provided services more stable. If the DHCP server is not working, it will affect the computers in the local area network to obtain IP addresses, thereby affecting access to services, while servers with static IP addresses are not affected, so static IP is also necessary (on devices providing services).
| Table of Contents: |
- Configuring a static IP address in RHEL/CentOS/Fedora:
- Setting a static IP address in Debian / Ubuntu (versions prior to 17.10):
- Setting a static IP address in Ubuntu (newer versions):
- Setting up VLAN in Ubuntu:
- Setting up Bridge in Debian:
| Configuring a static IP address in RHEL/CentOS/Fedora: |
To set a static IP address in RHEL / CentOS / Fedora
First check the local network interface name:
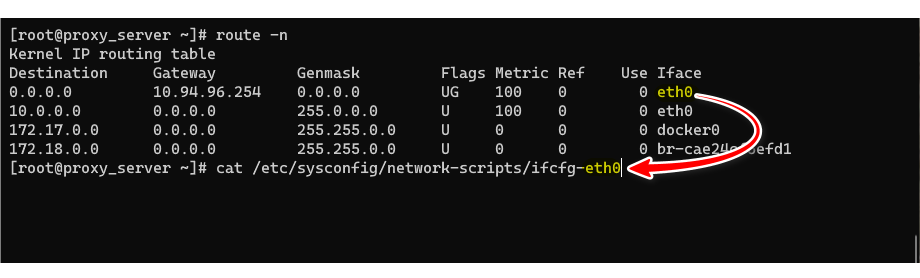
The above figure shows that the network interface name of the local machine is eth0, representing the edited network file ifcfg-eth0
Use nano or vim to edit:
vim /etc/sysconfig/network-scripts/ifcfg-eth0
Make changes to the ifcfg-eth0 file based on your own network:
DEVICE="eth0"
BOOTPROTO="static"
DNS1="8.8.8.8"
DNS2="1.1.1.1"
GATEWAY="192.168.0.1"
HOSTNAME="linux.kingtam.win"
HWADDR="00:19:99:A4:46:AB"
IPADDR="192.68.0.100"
NETMASK="255.255.255.0"
NM_CONTROLLED="yes"
ONBOOT="yes"
TYPE="Ethernet"
UUID="8105c095-799b-4f5a-a445-c6d7c3681f07"
You need to edit the following settings:
- BOOTPROTO is
dhcp(default) orstatic(static) - DNS1 and DNS2 can use public DNS services such as 8.8.8.8, 1.1.1.1
- Gateway (GATEWAY) is the IP of the router or firewall
- Host name (HOSTNAME) customizable
- Network mask (NETMASK) is usually 255.255.255.0 (/24) modify according to your own network parameters
- IP address (IPADDR) the local IP address
- ONBOOT whether to start automatically is
yesorno
Then edit: resolve.conf
resolve.confis used to set the definitions of each item when the DNS client requests name resolution.
vim /etc/resolv.conf
nameserver 8.8.8.8 # Modify with your preferred DNS address
nameserver 1.1.1.1 # Modify with your preferred DNS address
Use one of the following commands to restart the network and apply all settings:
/etc/init.d/network restart
systemctl restart network
| Setting a static IP address in Debian / Ubuntu (versions prior to 17.10): |
To set a static IP address in Debian/Ubuntu (versions prior to 17.10), open the following file:
vim /etc/network/interfaces
The default is dhcp:
 no-auto-down eth0 # or possibly auto eth0
 iface eth0 inet dhcp
Edit using nano or vim, and make changes based on your own network:
no-auto-down eth0
iface eth0 inet static
  address 192.168.0.100
  netmask 255.255.255.0
  gateway 192.168.0.1
  dns-nameservers 1.1.1.1
  dns-nameservers 8.8.8.8
The following settings need to be edited:
- Change
iface eth0 inet dhcp(default) toiface eth0 inet static(static) dns-nameserverscan have multiple values, such as using public DNS services like8.8.8.8,1.1.1.1gatewayis the IP address of the router or firewallnetmaskis usually 255.255.255.0 (/24), adjust according to your own network parametersaddressis the IP address of the local machine
After saving the interfaces settings, edit /etc/resolv.conf:
vim /etc/resolv.conf
nameserver 8.8.8.8 # Modify with your preferred DNS address
nameserver 1.1.1.1 # Modify with your preferred DNS address
Use one of the following commands to restart the network and apply all settings:
/etc/init.d/network restart
systemctl restart network
| Setting a static IP address in Ubuntu (newer versions): |
Starting from Ubuntu 17.10, Netplan is the default network management tool.
Network configuration files are stored in *.yaml files in the directory /etc/netplan/.
In my case, it is /etc/netplan/00-installer-config.yaml, and the default content is:
network:
  ethernets:
    eth0:
      dhcp4: true
  version: 2
Edit the 00-installer-config.yaml configuration file using nano or vim:
network:
  version: 2
  renderer: networkd
  ethernets:
    eth0:
     dhcp4: no
     addresses: [192.168.1.2/24]
     routes:
      - to: default
        via: 192.168.1.1
     nameservers:
       addresses: [8.8.8.8,1.1.1.1]
You need to edit the following settings:
renderer: networkdspecifies that this interface is managed by thesystemd-networkdservicedhcp4: nochanges to manual static IP address setupaddressesthe local IP address and network segmentnameserversDNS serveraddresses[8.8.8.8,1.1.1.1] can be multiple IP addresses
Save the 00-installer-config.yaml settings.
Apply the network settings using the following command:
netplan apply
| Setting up VLAN in Ubuntu: |
In this example, N1 is flashed with Armbian, and the network port is connected to the trunk port of the switch.
Dynamically obtain an IP address
The network configuration files are stored in *.yaml files in the /etc/netplan/ directory.
The default content of /etc/netplan/armbian-default.yaml is:
network:
  version: 2
  renderer: NetworkManager
Edit the /etc/netplan/armbian-default.yaml configuration file using nano or vim:
network:
  version: 2
  renderer: NetworkManager
  ethernets:
      eth0:
          dhcp4: true
  vlans:
      vlan.3:
          id: 3
          link: eth0
          dhcp4: true
The configuration file is written in YAML format, and various settings are included:
The “version: 2” in the first line specifies the YAML version used in this file.
The “renderer” field specifies the network management tool to be used, which in this case is “NetworkManager”, a popular tool for managing networks on Linux systems.
In the “ethernets” section, the “eth0” physical interface is configured, and the interface is set to obtain an IPv4 address via DHCP.
In the “vlans” section, the VLAN (Virtual Local Area Network) interface on the “eth0” network interface is configured. The VLAN ID is 3 and is connected to the physical interface “eth0” via the “link” field. The VLAN interface is also configured to obtain an IPv4 address via DHCP.
This configuration file sets up a network connection where both the physical interface “eth0” and the VLAN interface obtain dynamic IP addresses via DHCP.
Set static IP address
  version: 2
  renderer: NetworkManager
  ethernets:
      eth0:
        dhcp4: false
  vlans:
      vlan.3:
          id: 3
          link: eth0
          dhcp4: no
          addresses: [10.3.3.3/24]
          routes:
           - to: default
             via: 10.3.3.1
          nameservers:
            addresses: [8.8.8.8,1.1.1.1]
The VLAN configuration sets up a new interface vlan.3 with ID 3 associated with eth0. Its dhcp4 is set to no, with the static IP address 10.3.3.3 and subnet mask 24. The default route is specified through IP address 10.3.3.1, and 8.8.8.8 and 1.1.1.1 are set as DNS servers.
| Setting up Bridge in Debian: |
Without VLAN
To find out the default network interface name of the machine, use the following command:
ip -c route | head -n 1 | cut -d ' ' -f 5
eth0
Edit the network interface via text editor
sudo vim /etc/network/interfaces
i. As DHCP:
source /etc/network/interfaces.d/*

# The loopback network interface
auto lo
iface lo inet loopback

# Wired adapter #1
allow-hotplug eth0
no-auto-down eth0
# Bridge as DHCP
auto br0
iface br0 inet dhcp
    bridge_ports eth0
Then restart the networking service:
sudo systemctl restart networking.service
i. As Static:
source /etc/network/interfaces.d/*

# The loopback network interface
auto lo
iface lo inet loopback

# Wired adapter #1
allow-hotplug eth0
no-auto-down eth0
# Bridge setup to static IP
auto br0
iface br0 inet static
	address 10.1.1.10
	broadcast 10.1.1.255
	netmask 255.255.255.0
	gateway 10.1.1.1
	bridge_ports eth0
	bridge_stp off       # disable Spanning Tree Protocol
    bridge_waitport 0    # no delay before a port becomes available
    bridge_fd 0          # no forwarding delay
Then restart the networking service:
sudo systemctl restart networking.service
With VLAN (Advanced Example)
Make sure the vlan package is installed on the system:
sudo apt install vlan -y
If the host is a hypervisor consider adding below sysctl configurations:
echo "net.ipv4.ip_forward=1" | sudo tee -a /etc/sysctl.conf
echo "net.ipv4.conf.all.arp_filter=0" | sudo tee -a /etc/sysctl.conf
echo "net.ipv4.conf.all.rp_filter=2" | sudo tee -a /etc/sysctl.conf
Load configurations:
$ sudo sysctl -p
net.ipv4.ip_forward = 1 net.ipv4.conf.all.arp_filter = 0 net.ipv4.conf.all.rp_filter = 2
Then modify interfaces configurations:
sudo vim /etc/network/interfaces
The interface content is as follow:
source /etc/network/interfaces.d/*

# The loopback network interface
auto lo
iface lo inet loopback

# Wired adapter #1
allow-hotplug eth0
iface eth0 inet manual
    pre-up ifconfig $IFACE up
    pre-down ifconfig $IFACE down

# VLAN 3
auto eth0.3
iface eth0.3 inet manual

# Bridge br0
auto br0
iface br0 inet static
    bridge_ports eth0.3
    bridge_stp off
    bridge_waitport 0
    bridge_fd 0
    address 10.3.3.3
    netmask 255.255.255.0
    gateway 10.3.3.1
    dns-nameservers 1.1.1.1 8.8.4.4
Then restart the networking service:
sudo systemctl restart networking.service
| Conclusion: |
Each Linux distribution may have different methods for setting a static IP address, but the process is generally similar.
| Reference: |