Introduction
iVentoyis another convenient tool developed by the author (longpanda) of the famous ISO boot toolVentoy. The goal of this tool is to enable booting and startup through the PXE server without even preparing a flash drive, and the system is also very convenient to use.

Deploy
| SCENARIO01 (step-by-step) |
Download iVentoy
Please use the root privilege to run below commands
wget https://github.com/ventoy/PXE/releases/download/v1.0.20/iventoy-1.0.20-linux-free.tar.gz -O /tmp/iventoy.tar.gz
Extract the Package
tar -xvzf /tmp/iventoy.tar.gz -C /opt
Rename Directory
mv /opt/iventoy-1.0.20 /opt/iventoy
Remove the Downloaded Archive
rm /tmp/iventoy.tar.gz
Create systemd Service File
cat << EOF > /etc/systemd/system/iventoy.service
[Unit]
Description=iVentoy iPXE Server
Requires=network-online.target
After=network-online.target
Wants=network-online.target

[Service]
Type=forking
User=root
Group=root
WorkingDirectory=$DEST_DIR
ExecStart=$DEST_DIR/iventoy.sh -R start
ExecStop=$DEST_DIR/iventoy.sh stop

[Install]
WantedBy=multi-user.target
EOF
Reload systemd to Recognize the New Service
systemctl daemon-reload
Enable the Service to Start on Boot
systemctl enable iventoy
Start the Service
systemctl start iventoy
Execute all steps using a script (Option)
bash -c "$(wget -qLO - https://kingtam.eu.org/scripts/iventoy-deploy.sh)"
| SCENARIO02 (iVentoy LXC On PVE) |
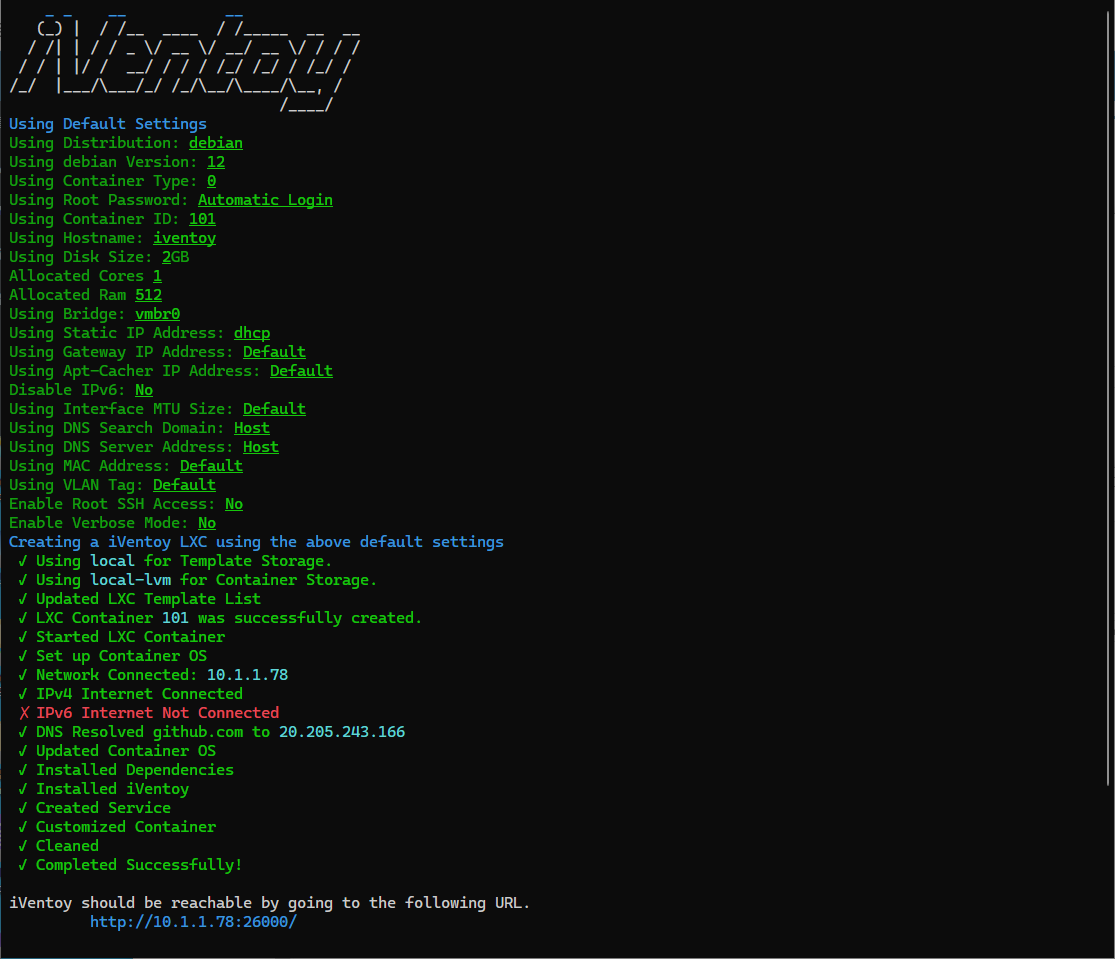
iVentoy is an enhanced version of the PXE server.
To create a new Proxmox VE iVentoy LXC, run the command below in the Proxmox VE Shell.
bash -c "$(wget -qLO - https://github.com/tteck/Proxmox/raw/main/ct/iventoy.sh)"
⚡ Default Settings: 512MiB RAM - 2GB Storage - 1vCPU - Privileged ⚡iVentoy Interface: IP:26000/
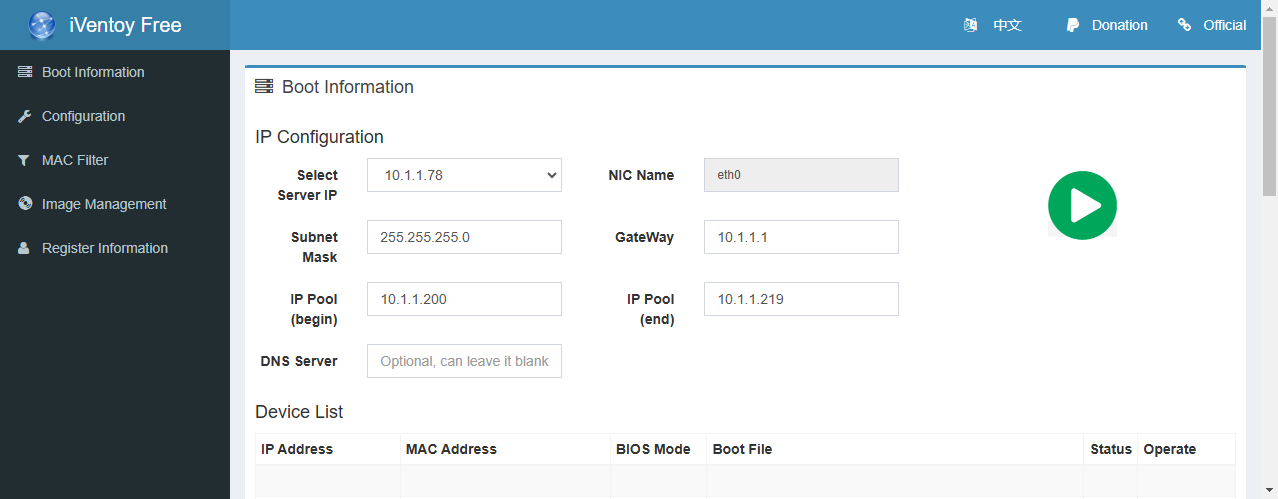
/etc/systemd/system/iventoy.service
[Unit]
Description=iVentoy PXE Booter
Documentation=https://www.iventoy.com
Wants=network-online.target
[Service]
Type=forking
Environment=IVENTOY_API_ALL=1
Environment=IVENTOY_AUTO_RUN=1
Environment=LIBRARY_PATH=/opt/iventoy/lib/lin64
Environment=LD_LIBRARY_PATH=/opt/iventoy/lib/lin64
ExecStart=sh ./iventoy.sh -R start
WorkingDirectory=/opt/iventoy
Restart=on-failure
[Install]
WantedBy=multi-user.target
| SCENARIO03 (Docker) |
A Docker image running iVentoy 1.0.20.
It is necessary to create the following directories before running the Docker container.
mkdir -p iventoy/{data,iso,log,user}
| Directory | Mount point | Description |
|---|---|---|
data | /opt/iventoy/data | For License file, config files. |
iso | /opt/iventoy/iso | For ISO files. |
log | /opt/iventoy/log | For log files. |
user | /opt/iventoy/user | For user files, third-part software, auto install scritps … |
Docker Compose
cat << EOF > docker-compose.yml
version: '3.9'
services:
  iventoy:
    image: szabis/iventoy:latest
    network_mode: "host"
    container_name: iventoy
    restart: always
    privileged: true #must be true
    environment:
      - AUTO_START_PXE=true
#    ports:
#      - "67:67/udp" # DHCP Server
#      - "69:69/udp" # TFTP Server
#      - "10809:10809" # NBD Server (NBD)
#      - "16000:16000" # PXE Service HTTP Server (iVentoy PXE Service)
#      - "26000:26000" # PXE GUI HTTP Server (iVentoy GUI)
    volumes:
      - ./data:/opt/iventoy/data
      - ./iso:/opt/iventoy/iso
      - ./log:/opt/iventoy/log
      - ./user:/opt/iventoy/user

EOF
Startup the Docker container
docker compose up -d
Use iVentoy via GUI
iVentoy GUI is based on WEB, we could open browser and visit http://x.x.x.x:26000 after you run iVentoy.
(x.x.x.x is the IP address of the computer that run iVentoy)
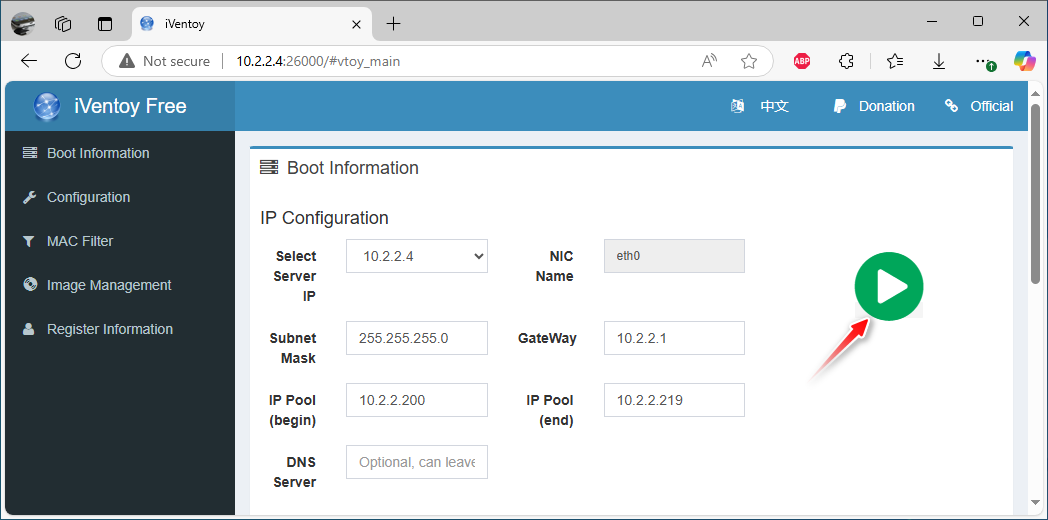
Before start
For the directories:
| Directory | Description |
|---|---|
| data | For License file, config files. |
| doc | For document |
| iso | For ISO files. |
| lib | For library files that needed by iVentoy. Don’t put other files here. |
| log | For log files. |
| user | For user files, third-part software, auto install scritps … |
Copy all your ISO files to the iso directory. You can create subdirectories arbitrarily under this directory to classify and store ISO files.

Note: Ensure that there are no Unicode characters or spaces in the directory name or ISO file name.
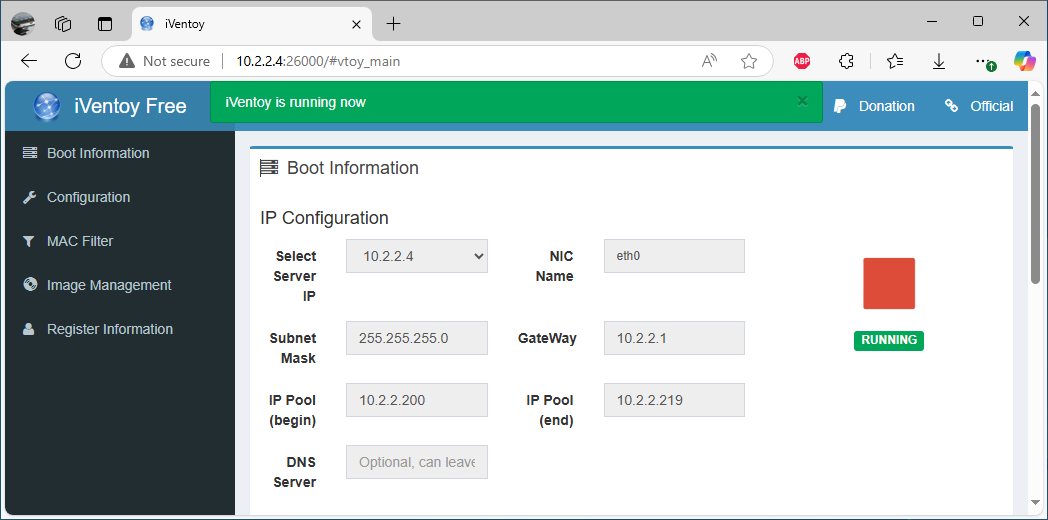
Start PXE Service
Select server IP and set the IP pool, then click the green button to start PXE service.
Third-part DHCP Server (Option)
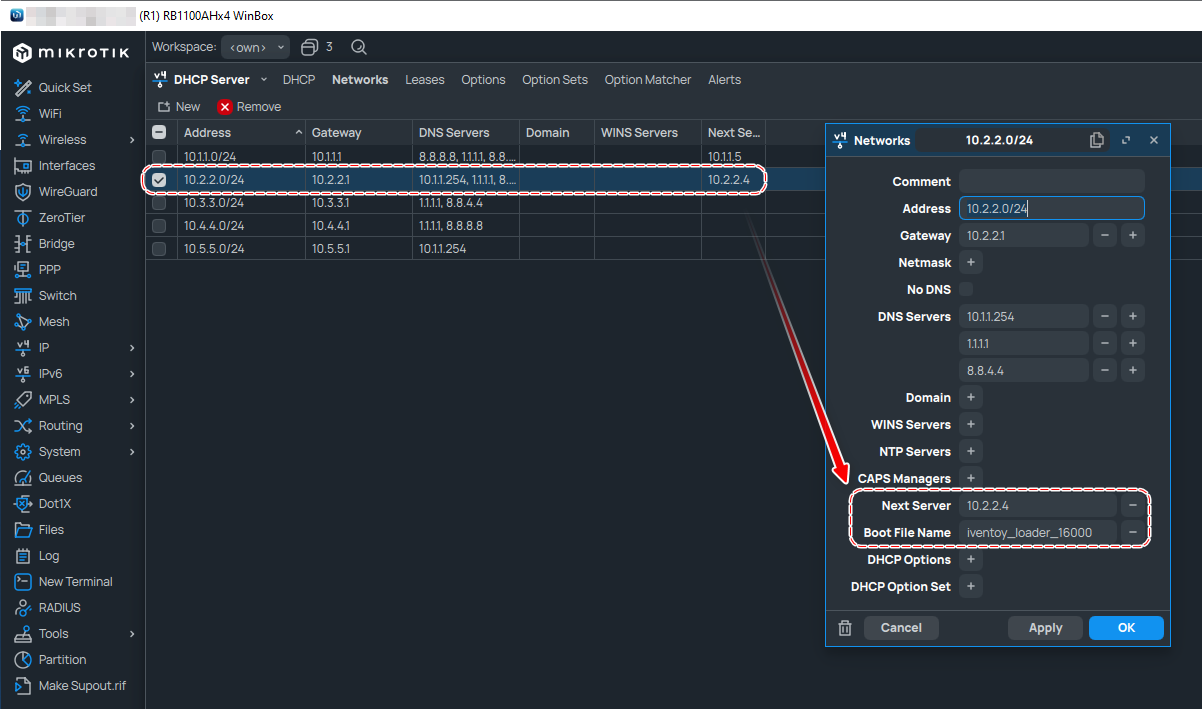
iVentoy can also work together with external DHCP Server. such as ROS, OpenWrt or Windows DHCP Server , making system installation less troublesome and simplifying user troubles!
External Mode
In my case, I use the External Mode since the DHCP server is located in the same subnet.
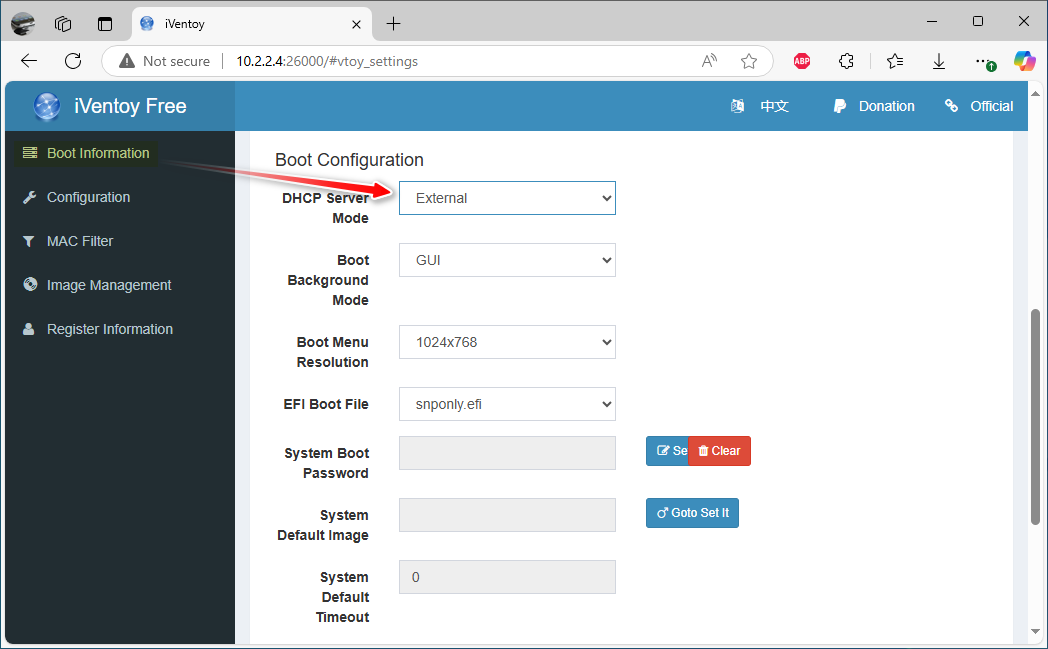
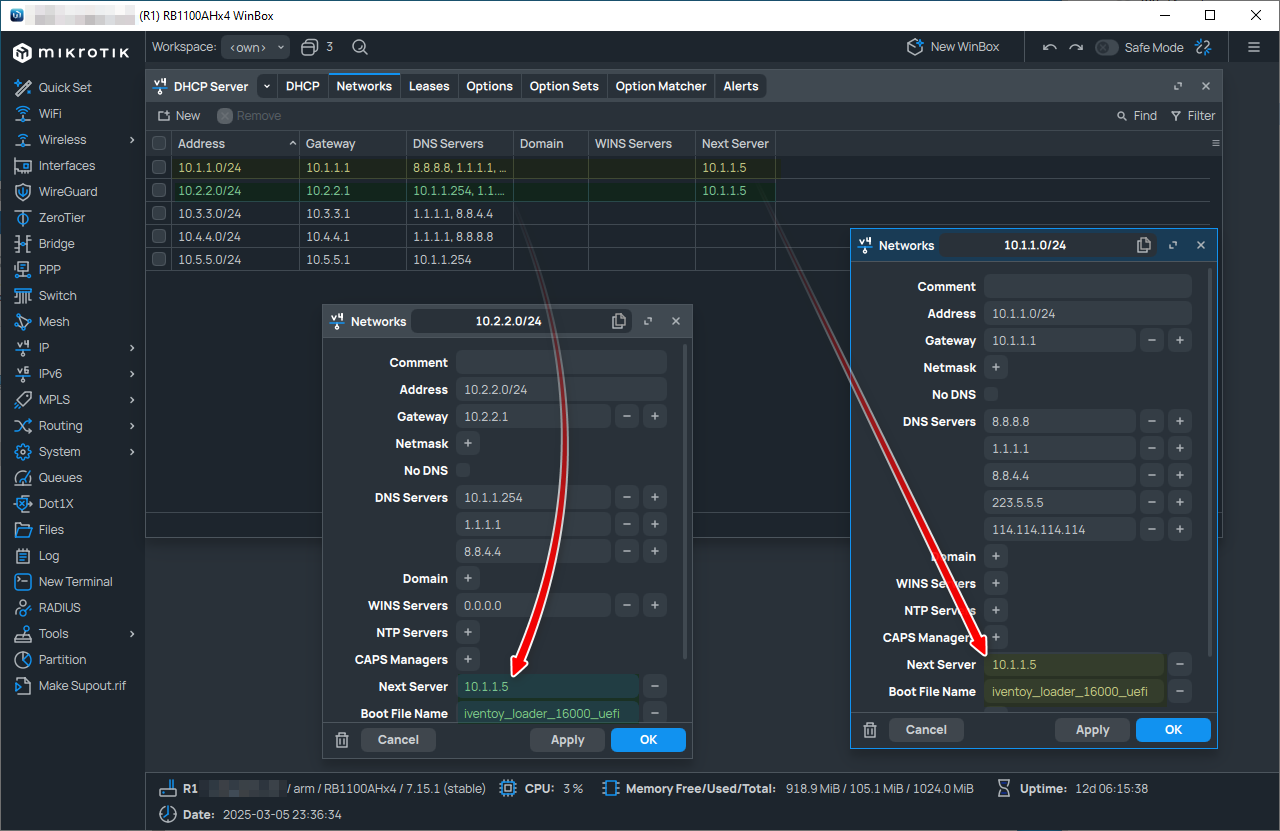
MikroTik RouterOS (Sample)
Windows DHCP Server (Sample)
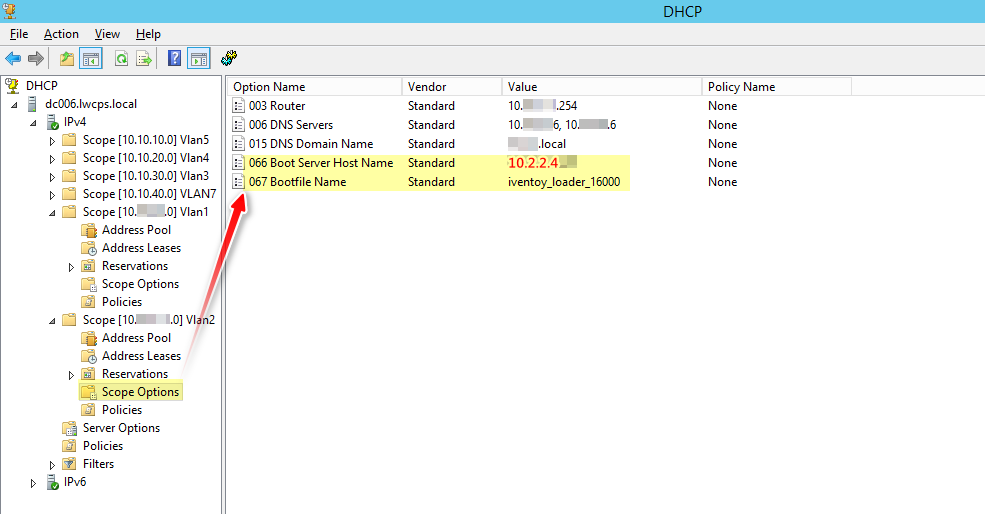
For External mode, set bootfile option value to iventoy_loader_16000
Note that the suffix 16000 is the iVentoy http server port, if you change it on the page then the bootfile should match it. (For example:
iventoy_loader_17000).
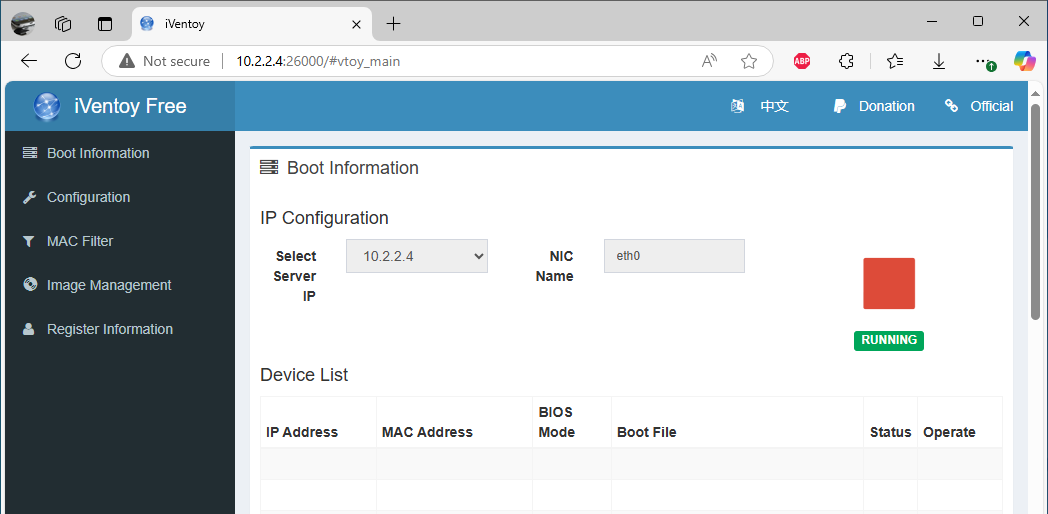
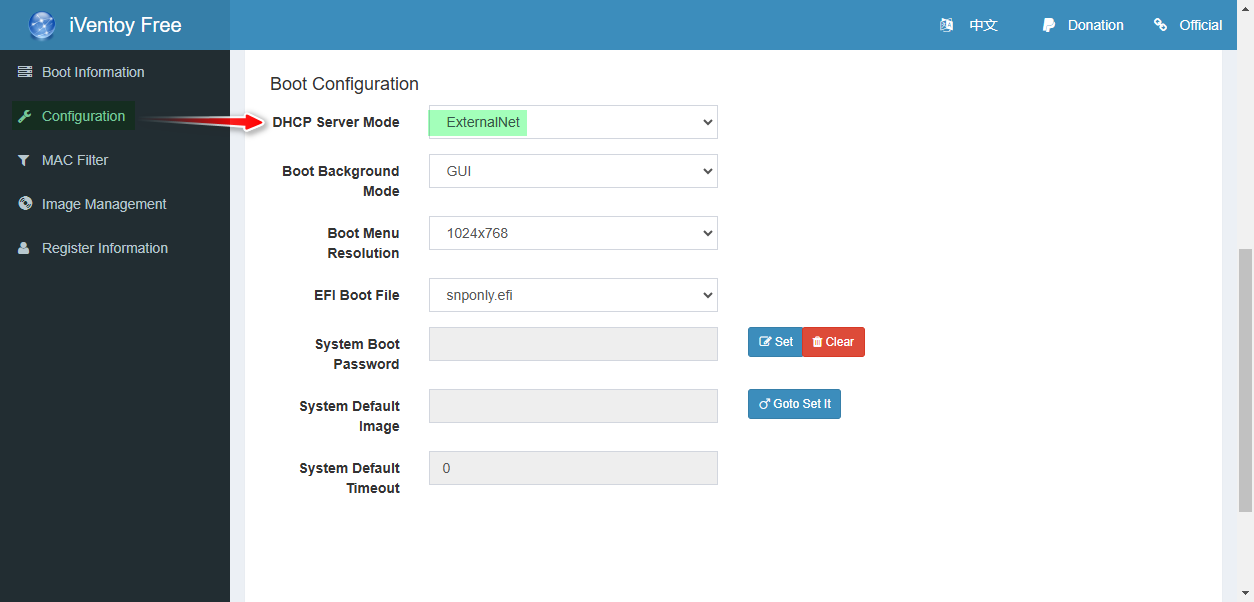
ExternalNet Mode
The usage scenario of ExternalNet mode is that iVentoy and the third-party DHCP Server are located in different LANs/VLANs.

iVentoy Auto Installation (Option)
To create an unattended deployment, we need to recreate a new ISO file based on the original ISO file and add the script or template into the new ISO file.
For Windows unattended deployment, use the Windows Answer File Generator. It is very simple and allows you to customize it as you want.
Configuration
In my case, I put the script in the path of the scripts directory: /opt/iventoy/user/scripts.
Select the corresponding ISO file on the iVentoy WEB GUI, and set the auto installation script path.
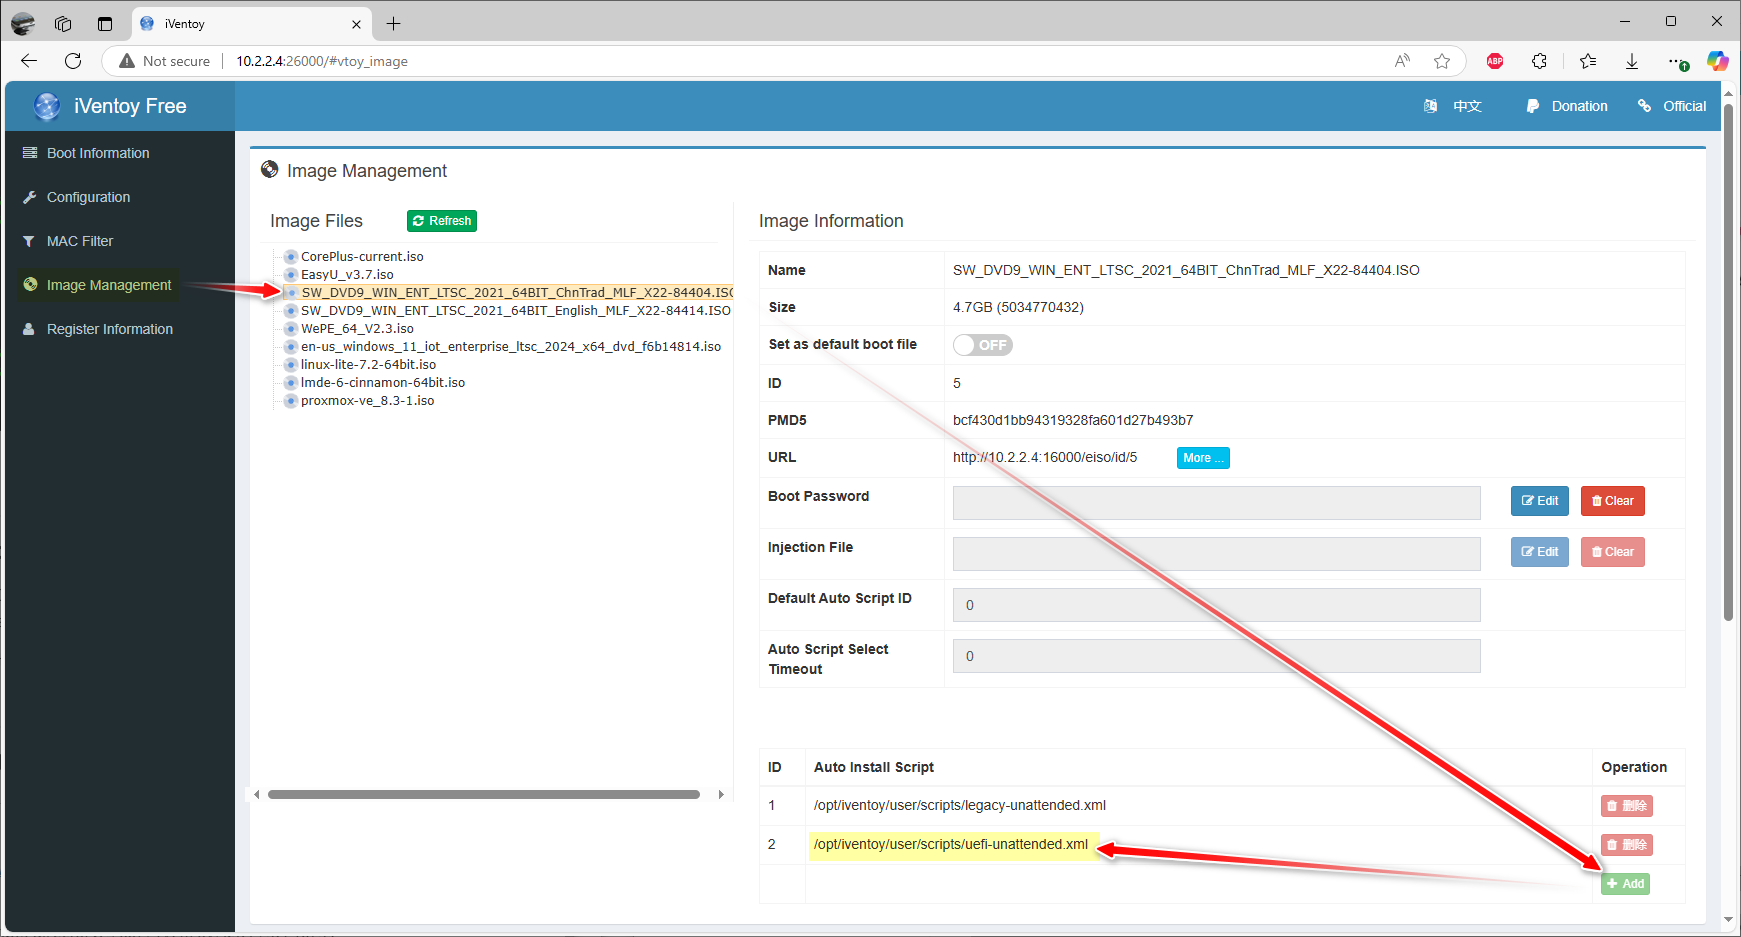
“More than one script for an ISO file is acceptable.
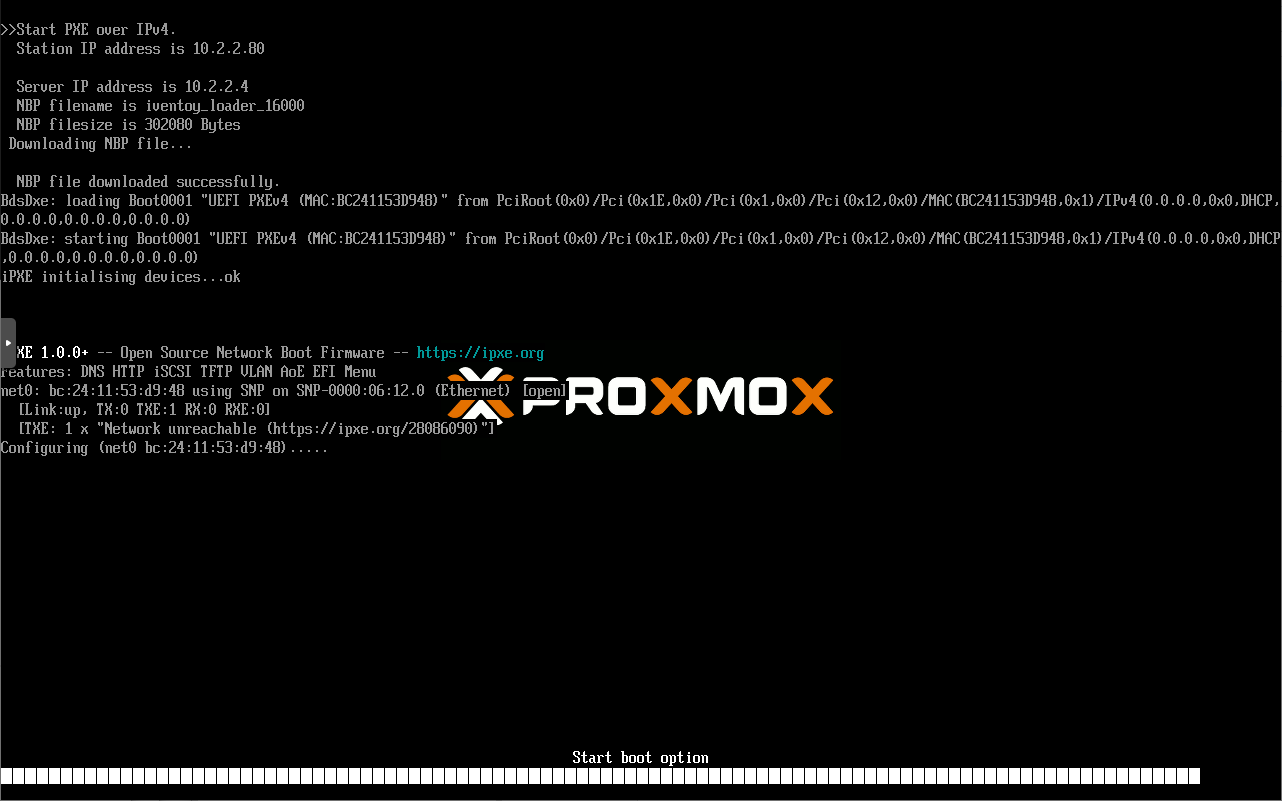
Start to deploy a system via iventoy
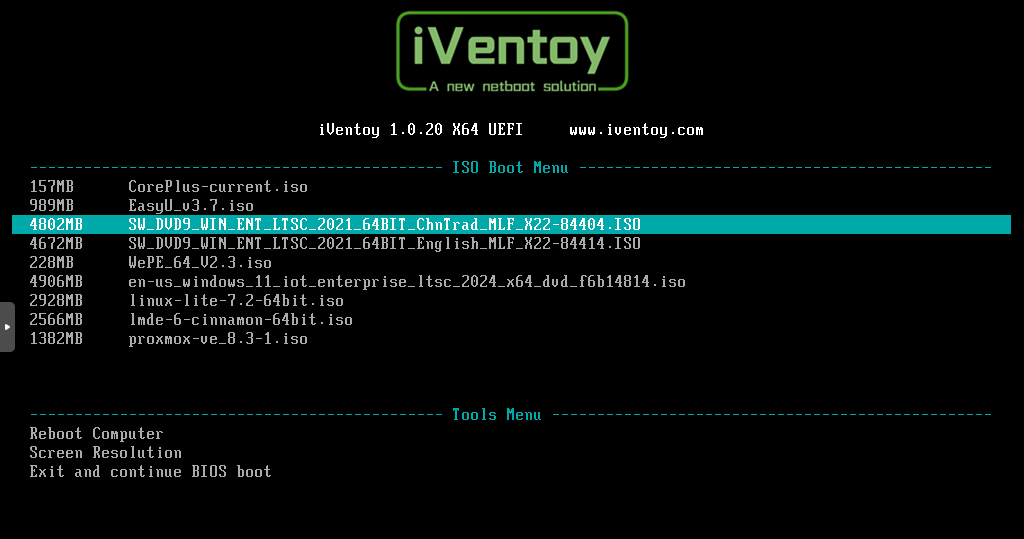

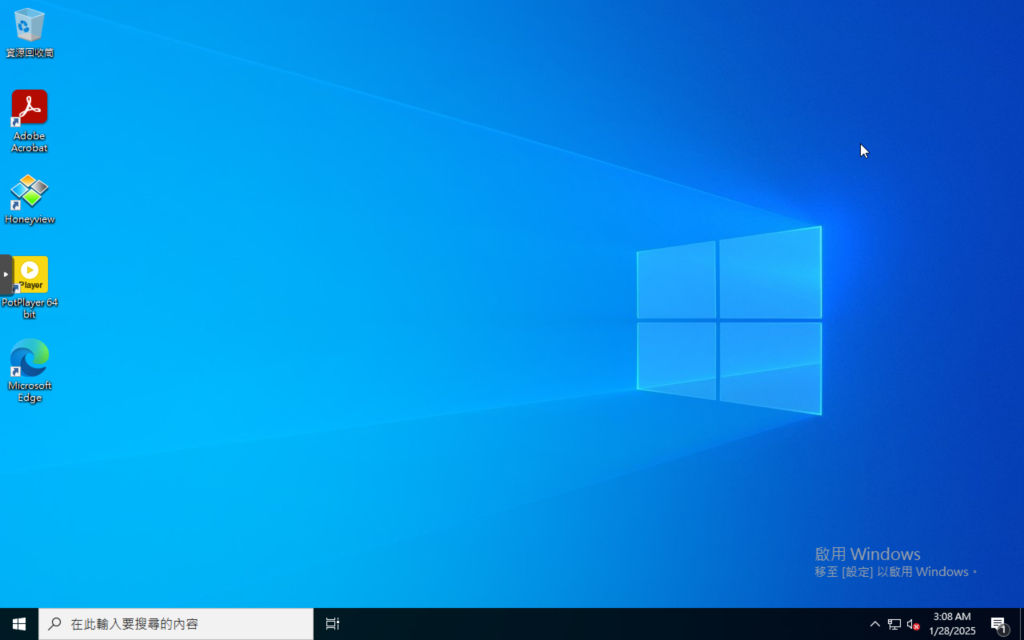
Conclusion:
Currently, most PCs and laptops have a built-in PXE boot function, often referred to as
Network Stack. It is highly recommended for those who have a lot of system refilling requirements to give this function a try.Using
iVentoy’s approach can significantly reduce the hassle when installing the system.
