Use Docker to deploy OpenWrt with Docker Compose, it’s easy to create and manage containers, making it an ideal solution for deploying OpenWrt on embedded devices.
Features
- OpenWrt official OpenWrt-22.03 branch version, Kernel 5.15, synchronized with the latest official source code.
- The original firmware is extremely pure. It only includes basic Internet access functions by default, and plug-ins can be selected online.
- The self-built plug-in repository includes almost all open source plug-ins.
- Customize through supes.top without requiring professional knowledge, and generate it in one minute.
- One-click OTA firmware update in the background.
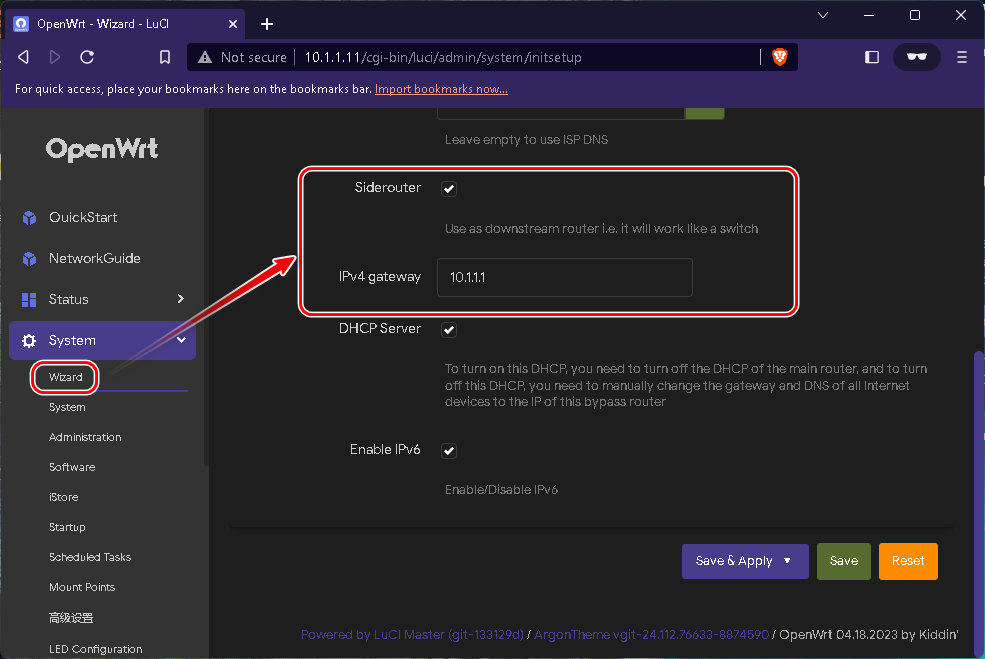
- One-click bypass route (SideRouter) and one-click switch IPv6.
- Supports online installation of all Kmod kernel modules.
- Replaces Uhttpd with Nginx, supporting reverse proxy, WebDAV, and more.
- Out-of-the-box (OOTB) feature.
Networking Information
Before we begin, let’s find out the networking information on the Linux system we will be using to deploy OpenWrt.
ip route
default via 10.1.1.1 dev eth0 metric 202 10.1.1.0/24 dev eth0 scope link src 10.1.1.97 172.17.0.0/16 dev docker0 scope link src 172.17.0.1
This command will display the routing table of the system, which includes the default gateway, subnet, and interface information.
| Name | Parameter |
|---|---|
| Interface | eth0 |
| Default Gateway | 10.1.1.1 |
| Subnet | 10.1.1.0/24 |
Enable the NIC (Network Interface Controller) promiscuous mode.
This is necessary for the OpenWrt container to access the internet.
ip link set eth0 promisc on
If unsure which interface to use, we can run the following command to automatically detect and enable promiscuous mode:
ip link set $(ip route | awk '/default/ {print $5}') promisc on
To check the promiscuous mode status, run the following command:
ip -d link | grep "promiscuity 1"
If the output shows “promiscuity 1”, then promiscuous mode is enabled.
Download the latest Image
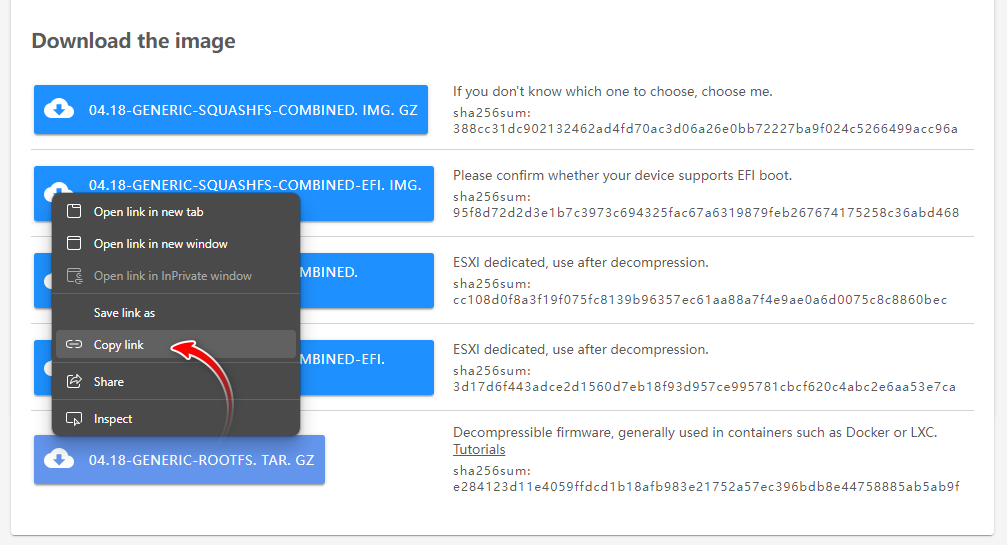
Download the latest OpenWrt image via Download or customize the OpenWrt firmware for your device
In this scenario, use Docker or LXC type for the architecture of the x86_x64 system.

wget https://supes.top/releases/targets/x86/64/openwrt-04.18.2023-x86-64-generic-rootfs.tar.gz
–2023-05-15 16:50:30– https://supes.top/releases/targets/x86/64/openwrt-04.18.2023-x86-64-generic-rootfs.tar.gz Resolving supes.top (supes.top)… 104.21.4.157 Connecting to supes.top (supes.top)|104.21.4.157|:443… connected. HTTP request sent, awaiting response… 200 OK Length: 98339727 (94M) [application/octet-stream] Saving to: ‘openwrt-04.18.2023-x86-64-generic-rootfs.tar.gz’
openwrt-04.18.2023-x86-64-gen 100%[=================================================>] 93.78M 61.5MB/s in 1.5s
2023-05-15 16:50:32 (61.5 MB/s) - ‘openwrt-04.18.2023-x86-64-generic-rootfs.tar.gz’ saved [98339727/98339727]
Once the image is downloaded, import it into Docker
docker import openwrt-04.18.2023-x86-64-generic-rootfs.tar.gz supes_openwrt
sha256:a31010a2bdc1b008522980d94da145883b663fb2fc86e91eacb85f22b0850cd0
Verify that the image has been imported successfully
docker images
REPOSITORY TAG IMAGE ID CREATED SIZE supes_openwrt latest 36f25cd1cee7 6 seconds ago 275MB
Start to Deploy
Using a Docker Compose file to define our container configuration.
Create a new file named “docker-compose.yml” with the following YAML code:
cat >> docker-compose.yml << EOF
version: '3.8'

services:
  openwrt:
    image: supes_openwrt
    container_name: openwrt
    command: /sbin/init
    privileged: true
    restart: always
    networks:
      openwrt-macvlan:
        ipv4_address: 10.1.1.11

networks:
  openwrt-macvlan:
    driver: macvlan
    driver_opts:
      parent: eth0
    ipam:
      config:
        - subnet: 10.1.1.0/24
          gateway: 10.1.1.1
EOF
This Docker Compose file defines a single service named “openwrt” that uses the “supes_openwrt” image we imported earlier.
Specifies that the container should be run in privileged mode and restarted automatically if it stops. Defines a network named “openwrt-macvlan” that uses the “macvlan” driver to create a virtual network interface for the container.
The network is assigned an IP address of 10.1.1.11 with a subnet of 10.1.1.0/24 and a gateway of 10.1.1.1.
To start the deployment
docker compose up -d
[+] Running 2/2 ✔ Network root_openwrt Created ✔ Container openwrt Started
To check the status of the container, run the following command:
docker compose ps
If everything is working correctly, you should see the “openwrt” service running with the status.
NAME IMAGE COMMAND SERVICE CREATED STATUS PORTS openwrt supes_openwrt “/sbin/init” openwrt About a minute ago Up About a minute
Modify OpenWrt login IP
Access the OpenWrt container
docker exec -it openwrt sh
BusyBox v1.35.0 (2023-04-30 14:20:01 UTC) built-in shell (ash)
The default login IP is 10.0.0.1. Use the IP 10.3.3.11 instead, and adjust it according to your personal situation.
sed -i 's/10.0.0.1/10.1.1.11/' /etc/config/network && /etc/init.d/network restart
Set OpenWrt to bypass mode (SideRouter)
Use the new IP address
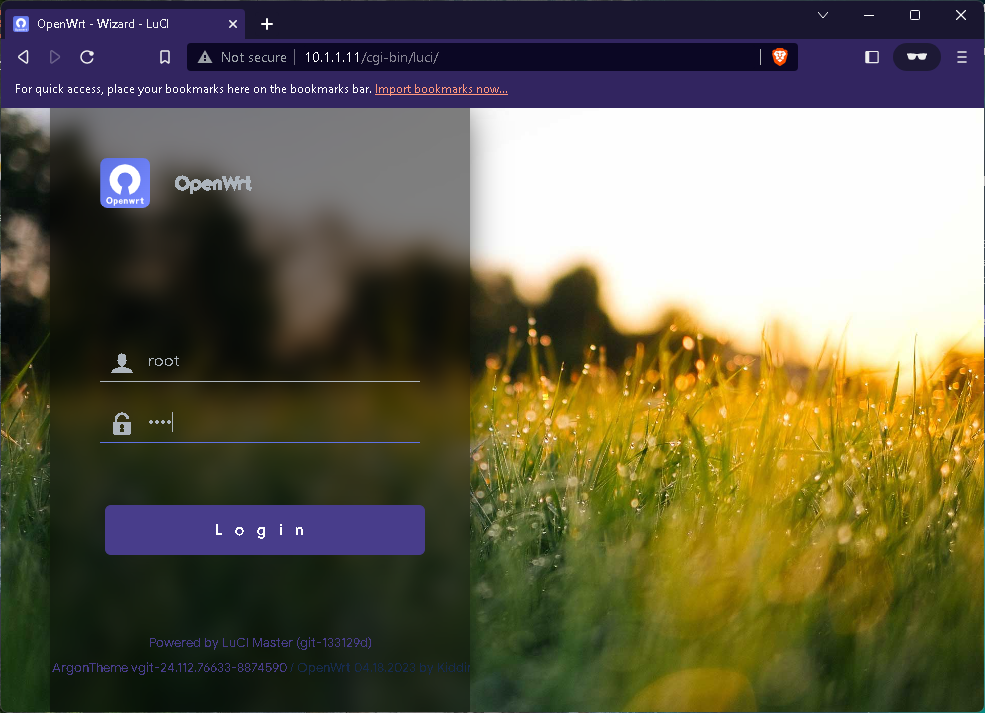
10.1.1.11login to OpenWRT via Browser and set up SideRouter mode.Default login password :root


Conclusion
kiddin9’s OpenWrt firmware offers customizable routers with the latest version and kernel, self-built plug-in warehouse, and easy customization through https://supes.top.
It supports one-click updates, bypass route, IPv6 switch, and online installation of all Kmod kernel modules. It replaces Uhttpd with Nginx, supporting reverse proxy, WebDAV, and more. All features are OOTB, making it easy for non-technical users.
Thanks to the author for this useful resource.
Reference
Related
- VPS uses Docker deployment to automatically renew freenom domain name
- Docker Application of OneCloud
- Deploy KMS with Docker
- Let NPM (Nginx Proxy Manager) and FRP (Fast Reverse Proxy) share 80/443 ports with wildcard domain
- Use Docker to Deploy FRP Services
- Install Docker and Docker Compose via shell script
- Deploy FRP server and client services using Docker via shell script
